Description
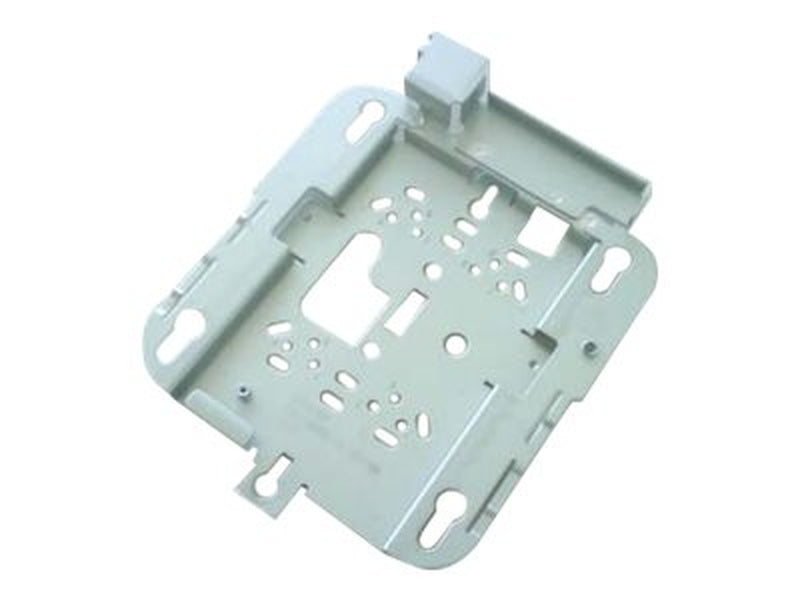
Cisco Universal Mounting Bracket for 802.11N Access Points [AIR-AP-BRACKET-2=]
Low-Profile Mounting Bracket Details

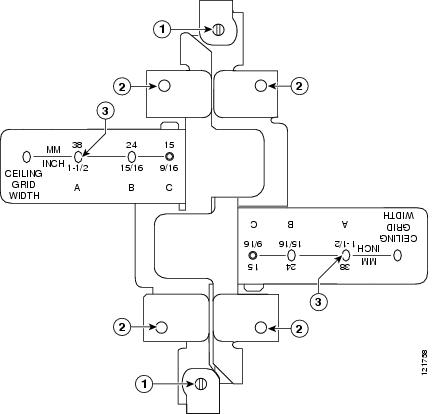
Universal Mounting Bracket Details

Specifications
FEATURES
• Material: Carbon Steel, Zinc Plated
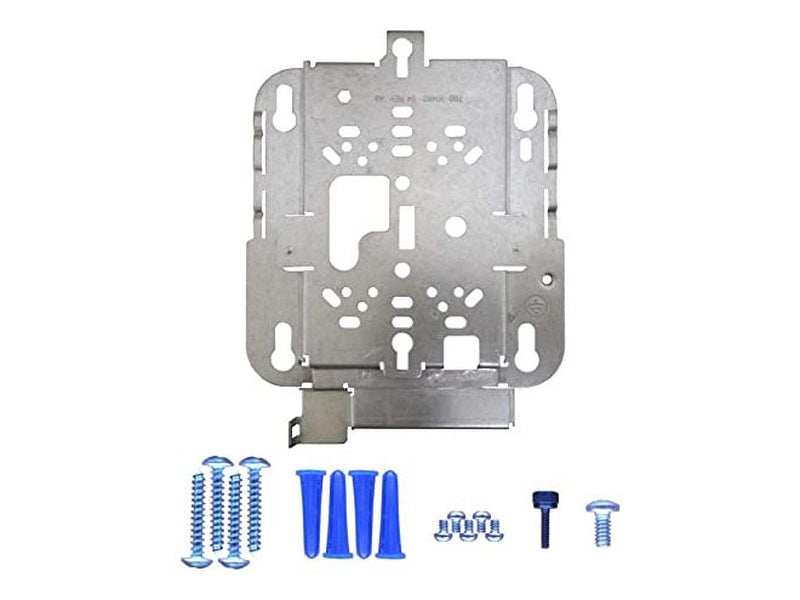
• 4 Drywall Anchors and 4 Screws
• Cisco network device mounting bracket
• Designed for Cisco Aironet 1040/1140/1260/3500/3600
WHAT'S INCLUDED
• 1 x Cisco AIR-AP-BRACKET-2= Universal Mounting Bracket
• Set of Screws
• User Guide
More Information
Mounting Brackets
The two most common mounting brackets are:
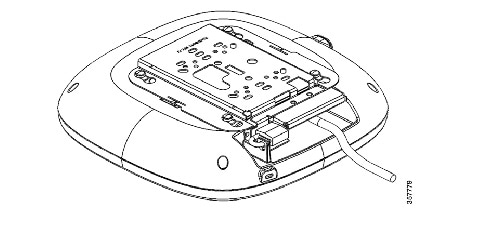
- The low-profile bracket (AIR-AP-BRACKET-1), provides a tight fit between the access point and the ceiling but does not accommodate network or electrical boxes or above ceiling mounts. Figure 1 shows the low-profile bracket installed on an access point.
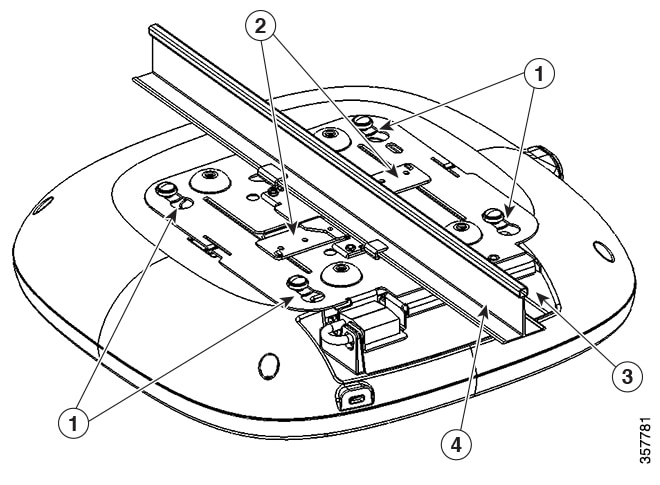
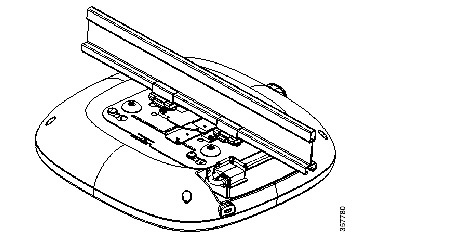
- The universal bracket (AIR-AP-BRACKET-2) is versatile (it works with electrical boxes, can be used for wall mounting, and above ceiling installations) but leaves a significant gap between the mounting surface and the access point than the low-profile bracket. A substantial gap is necessary for some locations because it allows space for cable routing. shows the universal bracket installed on an access point.
Figure 1 Low-Profile Mounting Bracket Installed on an Access Point
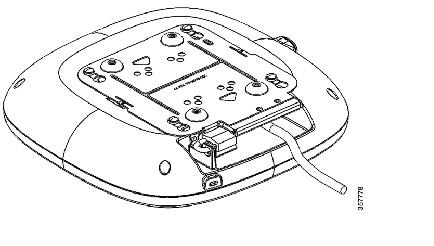
Figure 2 Universal Bracket Installed on an Access Point
Ceiling Grid Clips
You use a ceiling grid clip to mount an access point on a suspended ceiling. The ceiling tiles or rails will determine which clip best works for the installation. There are two types of ceiling grid clips:
- Ceiling Grid Clip, Recessed (AIR-AP-T-RAIL-R): If you have a recessed ceiling tile, this clip best fits between the AP and the ceiling.
- Ceiling Grid Clip, Flush (AIR-AP-T-RAIL-F): If you have a flat ceiling tile, this clip provides a snug fit between the AP and the ceiling.
For more details about the ceiling clips, see the Types of Ceiling Rails and Tiles section.
Figure 3 shows a ceiling grid clip.
Additional Adapters for Channel and Beam Ceiling Rails
The T-rail is the most common type of ceiling rail (the supports for the ceiling tiles). You can attach a ceiling grid clip directly to a T-rail ceiling rail. However, other types of ceiling rails, such as channel rails and beam rails, require an additional adapter clip (AIR-CHNL-ADAPTER). You need two adapter clips for each access point. Set screws on the clips and hold them securely on the ceiling rail.
Figure 4 shows the three types of ceiling rails: T-rail, channel, and beam. Figure 5 shows an access point installed with a mounting bracket, ceiling grid clip, and adapter clips.
Figure 4 Ceiling Rails and Tiles
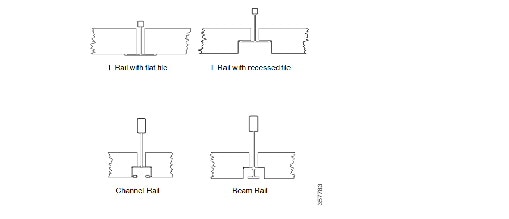
Figure 5 Adapter Clips Installed with Ceiling Grid Clips
Mounting an Access Point Below a Suspended Ceiling
Follow these steps to mount the access point below a standard or recessed, suspended ceiling. Figure 6 shows an access point mounted on a T-rail ceiling rail using a ceiling grid clip.
Figure 6 Suspended Ceiling Mounting Details